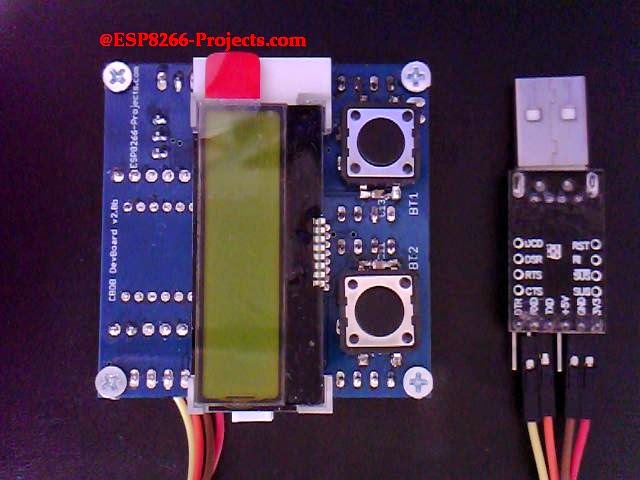
Part 2 of the the new CBDBv2 Evolution Series
Let's begin our today story with a quick remember of the CBDBv2 DevBoard features:
- Easy AP/Client Wifi Access
- Easy Firmware Programming
- Easy Software Development (LUA, ESP SDK/Eclipse, Arduino IDE - look at the bottom!)
- 18 bit ADC
- 12 bit DAC
- Voltage Measurement
- Current Measurement
- Temperature Measurement
- Real Time Clock
- High Resolution LCD COG Display with direct sunlight reading
- User Definable Buttons
- On Board 3.3V Regulator
Finished Board with headers and some EXT modules in place:
 |
| CBDB Evolution - bottom view |
 |
| EXT Modules |
 |
| CBDB Evolution - top view |
First thing to see is how easy is the process to configure and start using CBCBv2 (code name Evolution) Board. It will come preconfigured with NodeMCU, so, if LUA is your desired programming language you can just start using it.
In case of firmware update needed or if you want to change the environment, it is a very easy process, similar with the one used for MPSM Board.
What we will need:
- CBDBv2 board
- USB adapter (take a look on Part 1 for details how to connect them together)
- NodeMCU firmware (download latest - it's the floating point version for now)
- NodeMCU Flasher ( firmware programmer for NodeMCU DEVKIT)
- ESPTool ( Bootloader firmware programmer)
Uploading new firmware:
1. Using the clasic "jumper-style" procedure
- connect CBDB Module with the USB Adapter (Tx, Rx, 3v3, GND), Set the PROG jumper in the Programming mode position (closed) and power on
 |
| CBDBv2 - Firmware Programming mode enabled |
- Start NodeMCU Flasher. Choose you USB adapter corresponding port
- Add from Config Menu latest previously downloaded firmware. It must start from 0x0000. Disable anything else.
- Go back on Operation tab. Power off your CBDB Module. Press FLASH Button. power ON quick CBDB module. It will be recognised and will start flashing. Give it a second try if necessary.
- When finished succesfully A green OK checkmark will appear
- Power Off CBDB Module, Remove yellow jumper. Power back ON. Your CBDBv2 Board should be now programmed with the new NodeMCU Firmware.
If you change very often the firmware or want a easier way to use CBDBv2 DevBoard with Arduino IDE or direct GCC/Eclipse programming then maybe you will prefer the second available procedure for uploading your firmware:
2. Using the Auto reset/bootloading mode:
Another great tool for uploading new firmware for your CBDBv2 DevBoard is esptool.
I want to thank you themadinventor for such a great utility program and also want to thank for the received improvements from several members of the ESP8266 community, including pfalcon, tommie, 0ff and george-hopkins. Great job!
We will use in this example the CK version (thank you Christian) but any version of esptool that is supporting the RTS/DTR reset/bootloading mode must work ok. If you want to avoid compiling yourself the program you can download the binary file from here: esptool-bin.zip
Upload procedure:
- connect CBDB Module with the USB Adapter (Tx, Rx, RTS, DTR, 3v3, GND) and power on
 |
| Auto reset/bootloading mode configuration |
- In Command Prompt Start esptool.exe program:
cp - Select the serial port device to use for communicating with the ESP.
cd - Select the reset method to use for resetting the board.
cf - Select the firmware file that you want to flash memory
For further programming in LUA, it might be possible to do it directly in your Serial Terminal Program but I will recomend you to use a more dedicated program for that, like LuaLoader or LuaUploader. I will stay with the latest one, for it's great flexibility and simplicity.
To run a quick test, you can just use the code snippets provided by LuaUploader at start-up. Select the piece of code that you want to run and press "Execute Selection" button.
- To quick setup your WIFI network :
wifi.setmode(wifi.STATION)
wifi.sta.config ( "YOUR_WIFI_SSID" , "PASSWORD" )
print(wifi.sta.getip())
- For the Blinky test, just use a prepared LED as in the picture, insert it on previously used yellow jumper place (GPIO0) and run the code from below
 |
| Be careful with Anode / catode orientation |
-- Blink using timer alarm --
timerId = 0 -- we have seven timers! 0..6
dly = 500 -- milliseconds
ledPin = 3 -- 3=GPIO0
gpio.mode(ledPin,gpio.OUTPUT)
ledState = 0
tmr.alarm( timerId, dly, 1, function()
ledState = 1 - ledState;
gpio.write(ledPin, ledState)
end)
UPDATE !! UPDATE !! UPDATE !!
Yes, it's true.
For all the Arduino IDE lovers:
Arduino IDE first test for direct programming and firmware uploading on the new ESP8266 CBDBv2 Evolution DevBoard. No manual reset needed , no buttons to press, just press Upload and that's it!
Running Blinky LED program on GPIO15:
// the setup function runs once when you press reset or power the board
void setup() {
// initialize digital pin 15 as an output.
pinMode(15, OUTPUT);
}
// the loop function runs over and over again forever
void loop() {
digitalWrite(15, HIGH); // turn the LED on (HIGH is the voltage level)
delay(500); // wait for a second
digitalWrite(15, LOW); // turn the LED off by making the voltage LOW
delay(500); // wait for a second
}
No comments:
Post a Comment