Showing posts with label optocoupler NodeMCU. Show all posts

Tuesday, April 12, 2016

MPDMv4 - Universal AC MAINS Dimmer


For any new orders/requests please feel free to use as usual: tech at esp8266-projects.com. 
   
    MPDMv4 Boards are also available on Tindie: AC MAINS Dimmer - MPDMv4


--------------------------------------------------- DISCLAIMER --------------------------------------------------
WARNING!! You will play with LIVE MAINS!! Deadly zone!! 

      If you don't have any experience and are not qualified for working with MAINS power I will not encourage you to play arround!. The author take no responsibility for any injury or death resulting, directly or indirectly, from your inability to appreciate the hazards of household mains voltages.
   The circuit diagrams are as accurately as possible, but are offered with no guarantees whatsoever. 
    There is no guarantee that this design meets any Rules which may be in force in your country so please check before your local rules/regulations.
----------------------------------------------------------------------------------------------------------------------------
 
                                                             Creative Commons License

MPDMv4 by ESP8266-Projects.com is licensed under a Creative Commons Attribution-NonCommercial 4.0 International License.  

 ---------------------------------------------------------------------------------------------------------------------------


And the story behind:


  EVOLUTION.

  The next step in the MAINS Power Dimmer/Switch series.

   One of the main problem that people has been complained about was the fact that a simple MAINS Power Dimmer/Switch unit like the basic one presented last year is using sometime too much resources from a already overloaded application MCU/processor:

MPDMv3 - MAINS Dimmer/Switch with Phase detection


   One of the scenarios, directly related with ESP8266 is about the limited timers capabilities that you have. For example,  if you want to implement a proper web server to directly serve your webpages from ESP8266 you are automatically using one timer. If you want to start using the second one for your ZCD processing ...well...it's becoming very tricky. Very.

   Don't uderstand me wrong, a bigger, better MCU can do it probably very well, but even then if you have the chance to free some resources easily, do it!. And  I really cannot see a ESP8266 acting as a App MCU (webserver, data logger, MQTT client, etc, etc) and doing reliable also other demanding functions as  Processing Zero Crossing Detection.


   SOLUTION? 

    I can see only one, and it is a lesson learned many years ago: keep your real-time processing functions away from your Application MCU/Processor. To do that we just need to move the ZCD processing function from the ESP8266/whatever MCU you want to the MPDM Driver itself:


MPDMv4 - MAINS Phase detection and ZCD processing

   What means that? means that in this new configuration our ESP8266 will be free from any type of real-time ZCD processing that is related with the MAINS Dimming process, you just  need to send to the MPDMv4 driver a voltage (Vcontrol) in a pre-established range (0-3V for example) that will correspond with different desired Dimming levels.

 What we have obtained? A UNIVERSAL MAINS Power Dimmer driver that can be used with any MCU you might want or even no MCU at all. You can dimm it even with a simple Potentiometer at input, no programming, no code, no nothing!!


Legend:  
PURPLE  - Phase detector output
BLUE      - Reversed phase signal (normalised)
Yellow     - Triac Driver CMD signal (PWM)
 

Vcontrol = 0, CMD Duty cycle=6%


Vcontrol = 2V, CMD Duty=50%


Vcontrol = 2.8V,  CMD Duty=96%


  How can be done that? Easy. Use PWM or a DAC, your choice. For ESP8266 I will recommend you to use a DAC, like the MCP4726  or, why not , the MCP4728, for a full 4 Channel MAINS Dimmers solution. PWM in case of the ESP8266..let's say that is has some limitations that you will discover very soon that you don't like :)


The mains advantages of using DAC?

Notable: 

1. Very low to zero overhead on the App MCU
2. High precision (DAC from above are 12 bit!! - 4096 levels of dimming!!)
3. You can use the "set-and-forget" technique using DAC internal nonvolatile memory (EEPROM) and have the same level on the next power-off/on cycle.


  IMPLEMENTATION


   SCHEMATICS

    As the only functional difference between the previous MPDMv3 MAINS Dimmer and the new MPDMv4 is the presence of the ZCD function onboard, basically, without some small bits and pieces around like the MOV protection circuit, you can see it exactly as it is: a MPDMv3 with a ZCD circuit onboard:

MPDMv3 - Phase detection and Triac control


Zero crossing detector circuit


   MPDMv4 PCB:

MPDMv4 PCB

   As you can see from the above picture, it was carefully designed with proper MAINS isolation from the rest of the driver, you can see even the extra isolation slots done for a even bigger Creepage distance.

And because I know this terms still creates some confusion, short definitions below:

CLEARANCE is the shortest distance in air between two conductive parts.
CREEPAGE distance means the shortest distance along the surface of a solid insulating material between two conductive parts.

 A creepage distance cannot be less than the associated clearance so that the shortest creepage distance possible is equal to the required clearance. However, there is no physical relationship, other than this dimensional limitation, between the minimum clearance in air and the minimum acceptable creepage distance.


And the new, freshly baked result:

MPDMv4 - MAINS Power Dimmer/Switch with Phase detection and ZCD Processing


Next time we will move on to the Software side, to see what is going on with our Webserver interface & stuff.


Thursday, May 7, 2015

MPDMv3 - WIFI Mains Power Dimmer / Switch - Web Interface


----------------------------------------------------------------------------------------------------------------------------


WARNING!! You will play with LIVE MAINS!! Deadly zone!! 


      If you don't have any experience and are not qualified for working with MAINS power I will not encourage you to play arround!. The author take no responsibility for any injury or death resulting, directly or indirectly, from your inability to appreciate the hazards of household mains voltages.
   The circuit diagrams are as accurately as possible, but are offered with no guarantees whatsoever. 
    There is no guarantee that this design meets any Rules which may be in force in your country so please check before your local rules/regulations.

----------------------------------------------------------------------------------------------------------------------------  

     For any new requests please feel free to use as usual: tech at esp8266-projects.com.
 
     If you want to order MAINS POwer Dimmer/Switch bare PCBs only, you can also do it directly at Dirty PCBs, our preferred PCB House:

-----------------------------------------------------------------------------------------------------------------------------


     As I promised in the last article about the new MAINS Dimmer / Switch Module, Today we will continue with designing the Web interface access.


      What we will need:  


MAINS Power Dimmer / Switch Module - MPDMv3 - Connections


CBDB Evolution DevBoard


     Because I don't like to have flying MAINS wires on my workdesk I have created a temporary separate MPDMv3 Module Box, containing all the MAINS part of the story :).

Isolated MAINS unit - keep your fingers away from the Deadly zone !


      Remember, Safety First! And also more relaxing knowing that is no Russian Roulette wire game on progress on my table. Shit happens all the time, but at least let's try to reduce the chances to hit badly the fan too often :)


Live Testing on progress

   In the Box above is enough space for all the parts going inside, including ESP8266 module, power supply, Dimmer Module, Choke, etc, but at this stage I find it easier to connect them together like that.


MPDMv3 Web Server Software

For programming CBDBv2 Board and uploading the driver and the software we will continue to use the LuaUploader as before. 


1. Define used GPIO pin
:

      outpin=7                                                       -- Select Triac Command pin - GPIO13
      gpio.mode(outpin,gpio.OUTPUT)
      gpio.write(outpin,gpio.LOW)                       -- Triac OFF
      inpin=6                                                         -- Zero crossing detector input - GPIO12 
      gpio.mode(inpin,gpio.INT,gpio.PULLUP)   -- attach interrupt to ZCD


  2. Zero Cross Detector function and Triac command


      For a more detailed explanation how Zero cross detection circuit works please take a look at the previous MPDMv3 article.

      function zero_cross()
           dt = 76*dim
           --print("Zero cross detected!")
           stat = "ON"
           tmr.delay(dt)                                 -- Firing delay time calculated above
           gpio.write(outpin,gpio.HIGH)     -- Triac ON - Zero cross detected
           tmr.delay(100)                              -- Triac ON - Propagation time 
          gpio.write(outpin,gpio.LOW)        -- Triac OFF - let's be sure it's OFF before next cycle :)
          tmr.wdclr()
          return stat
     end


3. WEB Server

srv=net.createServer(net.TCP)
srv:listen(80,function(conn)
   conn:on("receive", function(conn,payload)
      --debugging output only
      -- print(payload)
      if (string.find(payload, "GET / HTTP/1.1") ~= nil) then
         --print("GET received")
         sendPage(conn)
      else
         swstat={string.find(payload,"cmd=")}
         --If POST value exist, set power switch status
         if swstat[2]~=nil then
            --print("Command received: " .. payload)
            PwrSW(swstat,payload)
            sendPage(conn)
         end
      end
   end)
   conn:on("sent", function(conn)
      conn:close()
      conn = nil -- clear and allow the garbage collector to free the memory
      --print("Connection closed")
     
   end)
end)


4. Send page function based on received requests

function sendPage(conn)
   conn:send('HTTP/1.1 200 OK\n\n')
   conn:send("<META HTTP-EQUIV=\"REFRESH\" CONTENT=\"5\">")
   conn:send('<!DOCTYPE HTML>')
   conn:send('<html>')
   conn:send('<head><meta content="text/html; charset=utf-8">')
   conn:send('<LINK href="http://www.instructables.com/files/orig/FGU/L48I/I98BK1X6  

                       /FGUL48II98BK1X6.css"')
   conn:send('rel="stylesheet" type="text/css">')
   conn:send('<title>ESP8266 - Power Switch Controller</title></head>')
   conn:send('<body><center><h1>ESP8266 MAINS Power Dimmer Controller</h1></center>')
   conn:send('<br /><br />')
   conn:send('<form action="/" name="dimmer" oninput="outputUpdate(cmd.value)" 

                     method="POST">')
   conn:send('<font color=red><b>ON </b></font><input style="width:550px; height:50px" 

                     type="range" name="cmd" id="cmd" value="')
   conn:send(status)
   conn:send('" min=1 max=128 step=1 />')
   conn:send('<font color=red><b>OFF</b></font></form>')
   conn:send('<br><center>Dimmer Value: <b>')        
      conn:send(status)
      conn:send(' pts</b></center>')
   conn:send('<script type="text/javascript">')
   conn:send('function outputUpdate(dim) {document.querySelector("#cmd").value = dim;')
   conn:send('document.forms[0].submit();}</script>')
   conn:send('</body></html>')
end


 CSS file created for this example is just for fancy decorations. If you don't like it you can very easy change the style attributes or add local ones.


5. Check received Dimmer value and update status

     function PwrSW(swstat,payload)
           gpio.mode(outpin,gpio.OUTPUT)
           newstat=string.sub(payload,swstat[2]+1,#payload)
           status = tonumber(newstat)
           print("Dimmer Value:" ..  status)
    end


4. Main code

       status = 60                   -- around 50% - choose your desired start value.
       newstat = 60
        outpin=7                     -- Select Triac Command pin - GPIO13  
        gpio.mode(outpin,gpio.OUTPUT)
        gpio.write(outpin,gpio.LOW)  -- Triac OFF
        inpin=6                      -- Zero crossing detector input - GPIO12 
        gpio.mode(inpin,gpio.INT,gpio.PULLUP)  -- attach interrupt to ZCD
 

       gpio.trig(inpin,"up",zero_cross)                 -- ZCD interrupt attached - trigger on falling edge
       print(wifi.sta.getip())                                  -- print our new MPDMv3 WebServer IP


      For testing, just save the code on ESP as 'dimserver.lua', restart ESP and run:   
 
            dofile("dimserver.lua")      -- Start the Dimmer Listening WebServer
               =wifi.sta.getip()              -- find the IP Address where your Web Server will be


     Open your favorite Web browser and type your new MPDMv3 Web Server IP address. If all ok, should look something like below :

MPDMv3 Web Interface


If you want the MPDMv3 software to start automatically when your CBDB module starts or reboots, then you neet to create and add some lines in your 'init.lua' file:
  
          dofile("dimserver.lua")  -- Start automatically the Dimmer Listening WebServer


Save the code on ESP as 'init.lua', restart ESP. It should reboot and restart automatically the program.


A short video presentation, testing the Web Interface:


Monday, April 27, 2015

P2 - ESP8266 Ultimate DevBoard - Firmware upload and first run


  Part 2 of the the new CBDBv2 Evolution Series


  Let's begin our today story with a quick remember of the CBDBv2 DevBoard features:


    Finished Board with headers and some EXT modules in place:

CBDB Evolution - bottom view

EXT Modules


CBDB Evolution - top view

   First thing to see is how easy is the process to configure and start using CBCBv2 (code name Evolution) Board. It will come preconfigured with NodeMCU, so, if LUA is your desired programming language you can just start using it.

   In case of firmware update needed or if you want to change the environment, it is a very easy process, similar with the one used for MPSM Board.


   What we will need:


Uploading  new firmware:


1. Using the clasic "jumper-style" procedure

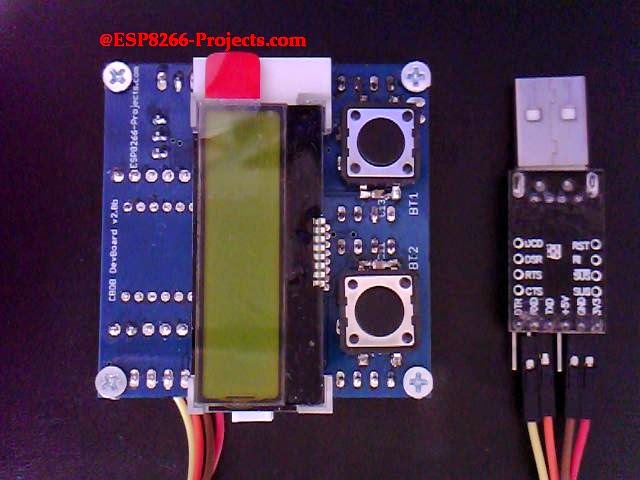
  • connect CBDB Module with the USB Adapter (Tx, Rx, 3v3, GND), Set the PROG jumper in the Programming mode position (closed) and power on

CBDBv2 - Firmware Programming mode enabled

  • Start NodeMCU Flasher. Choose you USB adapter corresponding port
  • Add from Config Menu latest previously downloaded firmware. It must start from 0x0000. Disable anything else. 
  • Go back on Operation tab. Power off your CBDB Module. Press FLASH Button. power ON quick CBDB module. It will be recognised and will start flashing. Give it a second try if necessary.
  •  When finished succesfully A green OK checkmark will appear
  •  Power Off CBDB Module, Remove yellow jumper. Power back ON. Your CBDBv2 Board should be now programmed with the new NodeMCU Firmware.


    If you change very often the firmware or want a easier way to use CBDBv2 DevBoard with Arduino IDE or direct GCC/Eclipse programming then maybe you will prefer the second available procedure for uploading your firmware:


2. Using the Auto reset/bootloading mode:

   Another great tool for uploading new firmware for your CBDBv2 DevBoard is esptool.
I want to thank you themadinventor for such a great utility program and also want to thank for the received improvements from several members of the ESP8266 community, including pfalcon, tommie, 0ff and george-hopkins. Great job!

   We will use in this example the CK version (thank you Christian) but any version of esptool that is supporting the RTS/DTR reset/bootloading mode must work ok. If you want to avoid compiling yourself the program you can download the binary file from here:  esptool-bin.zip


    Upload procedure:
  • connect CBDB Module with the USB Adapter (Tx, Rx, RTS, DTR, 3v3, GND) and power on
Auto reset/bootloading mode configuration


  • In Command Prompt Start esptool.exe program:
         D:\ESPTool>esptool.exe -cp COM34 -cd ck -cf nodemcu_latest.bin

          cp  - Select the serial port device to use for communicating with the ESP.
          cd  - Select the reset method to use for resetting the board.
          cf  - Select the firmware file that you want to flash memory


   For further programming in LUA, it might be possible to do it directly in your Serial Terminal Program but I will recomend you to use a more dedicated program for that, like LuaLoader or LuaUploader. I will stay with the latest one, for it's great flexibility and simplicity.

   To run a quick test, you can just use the code snippets provided by LuaUploader at start-up. Select the piece of code that you want to run and press "Execute Selection" button.

  • To quick setup your WIFI network :
        -- One time ESP Setup --
        wifi.setmode(wifi.STATION)
         wifi.sta.config ( "YOUR_WIFI_SSID" , "PASSWORD" ) 
         print(wifi.sta.getip())


  • For the Blinky test, just use a prepared LED as in the picture, insert it on previously used yellow jumper place (GPIO0) and run the code from below
Be careful with Anode / catode orientation

                -- Blink using timer alarm --
                timerId = 0 -- we have seven timers! 0..6
                dly = 500 -- milliseconds
                ledPin = 3 -- 3=GPIO0
                gpio.mode(ledPin,gpio.OUTPUT)
               ledState = 0
               tmr.alarm( timerId, dly, 1, function()
                  ledState = 1 - ledState;
                  gpio.write(ledPin, ledState)
               end)


UPDATE !! UPDATE !! UPDATE !!


Yes, it's true.

For all the Arduino IDE lovers:

Arduino IDE first test for direct programming and firmware uploading on the new ESP8266 CBDBv2 Evolution DevBoard. No manual reset needed , no buttons to press, just press Upload and that's it!

 Running Blinky LED program on GPIO15:

// the setup function runs once when you press reset or power the board
void setup() {
     // initialize digital pin 15 as an output.
     pinMode(15, OUTPUT);
}

// the loop function runs over and over again forever
void loop() {
     digitalWrite(15, HIGH);   // turn the LED on (HIGH is the voltage level)
     delay(500);              // wait for a second
     digitalWrite(15, LOW);    // turn the LED off by making the voltage LOW
     delay(500);              // wait for a second
}


Friday, April 17, 2015

P2 - WIFI Web Power Switch for MAINS - MPSM v.2 DevBoard - ESP8266


UPDATE!! UPDATE !!

New released MPDMv4 (MAINS Power Dimmer) Driver Board !


--------------------------------------------------------------------------------------------------------------------------

WARNING!! You will play with LIVE MAINS!! Deadly zone!! 


If you don't have any experience and are not qualified for working with MAINS power I will not ecourage you to play arround!

---------------------------------------------------------------------------------------------------------------------------- 

    Remember the story about the WIFI MAINS Power Switch module? 

    Because of the high interest in the subject, a new dedicated Dev Board has been born:  MPSMv2, a small ESP8266 DevBoard with integrated MAINS Power Switch! 

   Yes, it's finally here, arrived safely from the PCB factory and you can see it below. I know a lot of you are waiting it already, but please be patient few more days. None of the already requested ones will leave the premises without a proper 24 hour test.
  
   For any new requests please feel free to use as usual: tech at esp8266-projects.com.
     If you want for your own experiments to order CBD v2 EVO bare PCBs only, you can also do it directly at Dirty PCBs, our preferred PCB House:


MPSM v2 Schematic


    Theory of operation remain the same so please take a look at the previous Article about MAINS Power Switch for deeper explanations.

     I don't know if this it's the smallest MAINS Power Switch with integrated WIFI and direct Web interface access but if is not, it's definitely closer to be at only around 25x50mm :)

MPSM v2 - PCB - TOP
    As you can see from the PCB picture above you have even a full ESP8266 pinout access thru 2 breadboard friendly expansion slots for future projects development.


   Finally,  the received result from the PCB Factory, a long awaited moment:

MPSM v2  PCB Batch


MPSM v2 - TOP


      If you want to have a separate Breadboard friendly ESP8266 adapter with integrated 3.3V Power Supply, you can cut the board in 2 independent working parts, the ESP07/12 adapter and the MAINS Triac Switch.

    It is designed in such way that no harm will be done by the cut to the functioning of the circuit. You can use the cut MAINS Power Switch part directly even with your ARM, PIC, Arduino, whatever MCU you like this days without any problems as long as it has a GPIO pin capable to drive the MOC Optocoupler LED.

MPSM v2  - separate usage ESP8266 adapter and MAINS Switch

ESP8266 ESP-07/12 Adapter


      And the final result, a fresh baked one, ready for testing:

MPSM v2 - full asembled


MPSM v2 - full asembled - bottom


-----------------------------------------------------------------------------------------------------------------
   Before going further and start running some tests few considerations to be done:
  • Do NOT use it without proper Knowledge about MAINS circuits !
  • Do NOT use it without a proper FUSE on MAINS line! 
  • This is NOT a Toy!
-----------------------------------------------------------------------------------------------------------------


     What we will need:
  • MPSM DevBoard from above
  • USB adapter (take a look on Part 1 for details how to connect them together)  
  • NodeMCU firmware (download latest - can use the floating point version for now) 
  • NodeMCU Flasher ( firmware programmer for NodeMCU DEVKIT) 
  • For programming MPSM v2 DevBoard and uploading the software we will continue to use the LuaUploader as before. 


    Flashing the MPSM NodeMCU Firmware is a straigth away process:
  
Programming MPSM v2 Board


  •  Connect MPSM Board with the USB Adapter, Set the PROG jumper (YELLOW) in the  Programming mode position (closed) and power on 
  • Start NodeMCU Flasher. Choose you USB adapter corresponding port
  • Add from Config Menu latest previously downloaded firmware. It must start from 0x0000. Disable anything else. 
  • Go back on Operation tab. Power off your MPSM Board. Press FLASH Button. power ON quick MPSM Board. It will be recognised and will start flashing. Give it a second try if necessary.
  • When finished succesfully A green OK checkmark will appear
  • Power Off   MPSM Board, Remove yellow jumper. Power back ON. A NodeMCU programmed MPSM Board is ready for action :)


    For a more detailed explanation for NodeMCU Firmware flashing please take a look at CBDB Board Firmware Flashing discussion


 To quick run a test we will use the code snippets provided by LuaUploader at start-up. Select the piece of code that you want to run and press "Execute Selection" button.


  • To quick setup your WIFI network - If this is your first project with a new ESP module that was never used in your WIFI Network, don't forget it - one time only :
            -- One time ESP Setup --
            wifi.setmode(wifi.STATION)
            wifi.sta.config ( "YOUR_WIFI_SSID" , "PASSWORD" ) 
            print(wifi.sta.getip())


  • For the Triac Optocoupler Command testing we will use the "Blinky" part of the code and if all ok it will blink LED2 with the choosen rate "dly".
          Run the modified code from below:

          -- Blink using timer alarm --
          timerId = 0 -- we have seven timers! 0..6
          dly = 500 -- milliseconds
          ledPin = 1 -- 1=GPIO5  - allocated pin for Triac opto command
          gpio.mode(ledPin,gpio.OUTPUT)
          ledState = 0
          tmr.alarm( timerId, dly, 1, function()
                ledState = 1 - ledState;
                 gpio.write(ledPin, ledState)
          end)


  Now you can connect you MAINS powered lightbulb and you can see it playing the "Blinky" game too :).  Use proper heatsink for power disipation for your Triac.


    Power Switch function and WEB Server software are the same as in previous article about CBDB WIFI MAINS power switch  just change the used GPIO Triac opto command pin from outpin=3 to outpin=1 to properly reflect our new MPSM v2 Board setup


For a MAINS Power Dimmer Module, take a look at the new MPDMv3 Module


UPDATE !! UPDATE !! UPDATE !!

As many of you asked for a BOM list, please find it below:

Part Value Device
Package Description


R1 560 R-EU_R1206
R1206 RESISTOR, European symbol
R2 10k R-EU_R1206
R1206 RESISTOR, European symbol
R3 10k R-EU_R1206
R1206 RESISTOR, European symbol
R4 10k R-EU_R1206
R1206 RESISTOR, European symbol
R5 10k R-EU_R1206
R1206 RESISTOR, European symbol
R6 470 R-EU_R1206
R1206 RESISTOR, European symbol
R7 470 R-EU_0207/10
0207/10 RESISTOR, European symbol
R8 390 R-EU_0204/7
0204/7 RESISTOR, European symbol
R9 470 R-EU_R1206
R1206 RESISTOR, European symbol
R10 39/1W R-EU_0309/10
0309/10 RESISTOR, European symbol


C1 100n C-EUC1210
C1210 CAPACITOR, European symbol
C2 100u C-EUC1210
C1210 CAPACITOR, European symbol
C3 0.1u/400V C-EU075-032X103
C075-032X103 CAPACITOR, European symbol


IC1 REG1117 REG1117
SOT223 1A LDO Positive Regulator


LED1
LEDCHIPLED_1206
CHIPLED_1206 LED
LED2
LED3MM
LED3MM LED


OK1 MOC3041M MOC3041M
DIL06 6-Pin DIP ZCD Optoisolator Triac Driver
T1 BT137 BT137-600
TO220BV TRIAC - BT137/600 - NXP


AC_MAINS
MTA02-156
1X2MTA AMP connector
CMD
PINHD-1X2
1X02 PIN HEADER
JP1
PINHD-1X8BIG
1X08-BIG PIN HEADER
JP2
PINHD-1X8BIG
1X08-BIG PIN HEADER
PRG
PINHD-1X2
1X02 PIN HEADER
VIN
PINHD-1X2
1X02 PIN HEADER


ESP12 ESP-12 ESP8266_ESP-12
ESP8266-ESP12