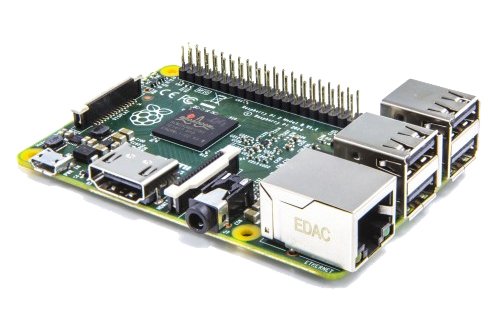
Showing posts with label Raspberry PI. Show all posts

Friday, April 14, 2017

Part 2 - Raspberry Pi + Domoticz AC Dimmer


     ---------------------------------------------------------------------------------------------------------------------------

                       Special April Sale Discounts!!


Special Spring Sale discounts for all the products available on Tindie Store:
https://www.tindie.com/stores/nEXT_EVO1/

Including the popular MPDMv4 Universal AC Mains Dimmer and the MPRSx8 Home Automation Board!

Spread the word and use Coupon code: NDSCVO10

Thank you all for your support!

 ---------------------------------------------------------------------------------------------------------------------------


Part 2 of the tutorial: Raspberry Pi + Domoticz + MPDM v4 AC dimmer board.


Part 2 topic: Domoticz setup & final testing :


What we will need:

- MPDMv4 Universal AC Dimmer - available also on Tindie Store !
- Raspberry PI 2 Board

- PIGPIO library for Raspberry PI  - take a look at Part 1 how to install and test
- Domoticz
   Latest available, on a Raspberry PI 2 Board install :  
     sudo curl -L install.domoticz.com | bash


Software 

Domoticz LUA script for RPi Dimmer:

commandArray = {}
DomDevice = 'RPi_Dimmer';
if devicechanged[DomDevice] then
   if(devicechanged[DomDevice]=='Off') then
     print ("OFF dimm = "..uservariables['dimm']);
     CalcValue = 860*1000;
   else if(devicechanged[DomDevice]=='On') then
        DomValue = uservariables['dimm'];
        print ("ON dimm = "..uservariables['dimm']);
        CalcValue = DomValue;
      else
         print("Other");
         DomValue = otherdevices_svalues[DomDevice];
         CalcValue = (900-(DomValue*9))*1000;
         commandArray['Variable:dimm'] = tostring(CalcValue);
--         commandArray['Variable:dimm'] = CalcValue;
         print ("dimm Level = "..uservariables['dimm']);
   end
   end
   runcommand = "pigs hp 18 400 " ..tonumber(CalcValue);
   print("PWM calculated value= "..CalcValue);
   print("Run command: " ..runcommand);
   os.execute(runcommand);
end
return commandArray

 Save it as "script_device_RPi_Dimmer.lua" in the "domoticz/scripts/lua" folder !


--------------------------------------------------- DISCLAIMER --------------------------------------------------
WARNING!! You will play with LIVE MAINS!! Deadly zone!! 
      If you don't have any experience and are not qualified for working with MAINS power I will not encourage you to play arround!. The author take no responsibility for any injury or death resulting, directly or indirectly, from your inability to appreciate the hazards of household mains voltages.
   The circuit diagrams are as accurately as possible, but are offered with no guarantees whatsoever. 
    There is no guarantee that this design meets any Rules which may be in force in your country so please check before your local rules/regulations.
----------------------------------------------------------------------------------------------------------------------------
 
                                                             Creative Commons License

All materials and boards released under ESP8266-Projects.com are licensed under a Creative Commons Attribution-NonCommercial 4.0 International License 


Wednesday, April 5, 2017

Raspberry Pi + Domoticz AC Dimmer - Part 1


     ---------------------------------------------------------------------------------------------------------------------------

                       Special April Sale Discounts!!


Special Spring Sale discounts for all the products available on Tindie Store:
https://www.tindie.com/stores/nEXT_EVO1/

Including the popular MPDMv4 Universal AC Mains Dimmer and the MPRSx8 Home Automation Board!

Spread the word and use Coupon code: NDSCVO10

Thank you all for your support!

 ---------------------------------------------------------------------------------------------------------------------------


New Tutorial related with direct connection setup between Raspberry Pi board and MPDM v4 AC dimmer board.

Part 1: General view, wiring and hardware setup :


What we will need:

- MPDMv4 Universal AC Dimmer - available also on Tindie Store !
- Raspberry PI 2 Board
- Domoticz
   Latest available, on a Raspberry PI 2 Board install :  
     sudo curl -L install.domoticz.com | bash


Software 

1. PIGPIO library for Raspberry PI install script:
rm pigpio.zip
sudo rm -rf PIGPIO
wget abyz.co.uk/rpi/pigpio/pigpio.zip
unzip pigpio.zip
cd PIGPIO
make -j4
sudo make install
save it in the choosen directory for your PIGPIO library as "install.sh" and run also command:
chmod 775 install.sh

2. Testing script:
#!/usr/bin/env python

#*** MPDMv4 Universal AC Dimmer PWM Example  ****************
#*                                                          *
#* This demo is using RPi2 GPIO18 (header pin 12)!!         *
#*                                                          *
#* Wiring table:                                            *
#* MPDMv4      Raspberry PI 2                               *
#*   VCNT  ->  GPIO18      - header pin 12                  *
#*    GND  ->  GND         - header pin 6                   *
#*    VCC  ->  VCC (+3,3V) - header pin 1                   *
#*                                                          *
#* tech@esp8266-projects.com                                *
#*                                                          *
#************************************************************
 
import pigpio

GPIO=18

pi = pigpio.pi()

if pi.connected:
   print("Connected to pigpio daemon !\n")

dm = 0
while dm < 860:
    dm = input("Enter Dimmer Value: ")
    dm = int(dm)
    pi.hardware_PWM(GPIO, 5000, dm*1000) # 5000Hz dm*1000% dutycycle

print("\nOut of range. Exiting...")
pi.hardware_PWM(GPIO, 5000, 860000) # 5000Hz 95% dutycycle
pi.stop()


save it as "test.py" in the PIGPIO folder generated after the full install is done.


Next time: Domoticz setup & configuration and Dimmer testing.


--------------------------------------------------- DISCLAIMER --------------------------------------------------
WARNING!! You will play with LIVE MAINS!! Deadly zone!! 
      If you don't have any experience and are not qualified for working with MAINS power I will not encourage you to play arround!. The author take no responsibility for any injury or death resulting, directly or indirectly, from your inability to appreciate the hazards of household mains voltages.
   The circuit diagrams are as accurately as possible, but are offered with no guarantees whatsoever. 
    There is no guarantee that this design meets any Rules which may be in force in your country so please check before your local rules/regulations.
----------------------------------------------------------------------------------------------------------------------------
 
                                                             Creative Commons License

All materials and boards released under ESP8266-Projects.com are licensed under a Creative Commons Attribution-NonCommercial 4.0 International License 


Thursday, March 9, 2017

MPRSx8 - P4 - Domoticz configuration


MPRSx8 Board is available also on Tindie store: https://www.tindie.com/stores/nEXT_EVO1/

For MPRSx8 general presentation and hardware description please take a look also at Part 1 of the MPRSx8 series:http://www.esp8266-projects.com/2016/11/wifi-mains-8x-relay-board-for-home.html


Part 4 of the MPRSx8 + ESPEasy Tutorial - After having all the bits & pieces in place, ESPEasy Formware properly uploaded and configured, now is time for the Domoticz setup and testing the Control interface!


What we will need:
         - CP2102 version
         - Another even smaller size version
         - extra pinout version
         - FT232 Version - Full pinout. Looks nice but because of the FTDI horror stories I would probably stay away from it.


Thank you all for watching and see you next time! If you like my Articles and Tutorials please subscribe!

Happy breadboarding,
TJ.

The MPRSx8 - Home Automation DevBoard - Domoticz ESPEasy

The MPRSx8 - Home Automation DevBoard meets Domoticz !

MPRSx8 Board is available also on Tindie store: https://www.tindie.com/stores/nEXT_EVO1/

For MPRSx8 general presentation and hardware description please take a look also at Part 1 of the MPRSx8 series:http://www.esp8266-projects.com/2016/11/wifi-mains-8x-relay-board-for-home.html


Part 3 of the MPRSx8 + ESPEasy Tutorial - This time we will take a deeper look on the ESPEasy Firmware configuration and preparing the MPRSx8 Board for Domoticz integration:


What we will need:
         - CP2102 version
         - Another even smaller size version
         - extra pinout version
         - FT232 Version - Full pinout. Looks nice but because of the FTDI horror stories I would probably stay away from it.


Here you can find Part 4: Domoticz configuration and final tests

Friday, February 17, 2017

MPRSx8 - ESPEasy Firmware P2 - Upload with standard USB-to-Serial Adapter

The MPRSx8 - Home Automation DevBoard meets ESPEasy Firmware :)

MPRSx8 Board is available also on Tindie store: https://www.tindie.com/stores/nEXT_EVO1/

For MPRSx8 general presentation and hardware description please take a look also at Part 1 of the MPRSx8 series:http://www.esp8266-projects.com/2016/11/wifi-mains-8x-relay-board-for-home.html


Part 2 of the series, ESPEasy Firmware Upload tutorial using a simple standard USB-to-Serial Adapter:


The story behind:
 
   Somebody was asking if is really possible to upload firmware with a simple USB to serial adapter, as the ones that are available all over the place. As you can see from the above step-by-step tutorial it is possible and is working very smooth. You are loosing the autoreset and autoupload capabilities of the USBProg board, but as long as you are doing rarely the firmware upload is not so bad. 
   On the other hand, if you want to use it with Arduino IDE or anything else that means frequent upload then I think you will start looking after that functions sooner or later, I think more sooner than later :) 


What we will need:
         - CP2102 version
         - Another even smaller size version
         - extra pinout version
         - FT232 Version - Full pinout. Looks nice but because of the FTDI horror stories I would probably stay away from it.


Next time we will move further with the ESPEasy firmware configuration, see here Part 3: ESPEasy Firmware configuration for Domoticz integration.

Thursday, February 9, 2017

ESPEasy Series - MPRSx8 Home Automation Board - Part 1


The MPRSx8 - Home Automation DevBoard meets ESPEasy Firmware :)

MPRSx8 Board is available also on Tindie store: https://www.tindie.com/stores/nEXT_EVO1/

For MPRSx8 general presentation and hardware description please take a look also at Part 1 of the MPRSx8 series:http://www.esp8266-projects.com/2016/11/wifi-mains-8x-relay-board-for-home.html


Part 1 of the series, ESPEasy Firmware Upload tutorial:


What we will need:
Next time we will see how to upload ESPEasy firmware using a standard USB adapter.


Thursday, December 8, 2016

ESPEasy - P3 - Domoticz - Windows - MPDMv4 AC Dimmer setup example


In this Part3 of the ESPEasy series we are talking about the changes that need to be done for a Windows 7 Domoticz installation.


You can find more details about ESP Easy firmware HERE, on the ESP Easy WIKI page


What we will need:

- ESP8266 NextEVO Board
- MPDMv4 Universal AC Dimmer - available also on Tindie Store !
- ESP Easy firmware
- Domoticz - Windows version
- CURL for Windows
- PC with Windows 7 OS installed


The install process is pretty straight forward so I will not insist to much on it:

1. Install Domoticz
2. Install CURL
3. Save LUA script in Domoticz \scripts\lua folder
4. Check that you don't have any Firewall/AV/Whatever program blocking the Network IN/OUT traffic for the needed programs and Ports !

For the used version of CURL for Windows installed  I was forced to change a bit the sintax, nothing fancy, just see below:
 
   runcommand = "curl http://" .. IP .. "/control?cmd=PWM,"  ..PIN.. "," .. CalcValue .. " ";


Software 

Updated  LUA Script for Domoticz for WINDOWS MPDM4 Universal AC Dimmer implementation:

commandArray = {}
DomDevice = 'MPDMv4_Dimmer';
IP = '192.168.2.106';
PIN = "5";
if devicechanged[DomDevice] then
   if(devicechanged[DomDevice]=='Off') then
     print ("OFF dimm = "..uservariables['dimm']);
     CalcValue = 890;
   else if(devicechanged[DomDevice]=='On') then
        DomValue = uservariables['dimm'];
        print ("ON dimm = "..uservariables['dimm']);
        CalcValue = DomValue;
      else
         print("Other");
         DomValue = otherdevices_svalues[DomDevice];
         CalcValue = 900-(DomValue*9);
         commandArray['Variable:dimm'] = tostring(CalcValue);
         print ("dimm Level = "..uservariables['dimm']);
   end
   end
   runcommand = "curl http://" .. IP .. "/control?cmd=PWM,"  ..PIN.. "," .. CalcValue .. " ";
   os.execute(runcommand);
print("PWM calculated value= "..CalcValue);
end
return commandArray

You need to save it in your Domoticz folder under "/scripts/lua/" subfolder as "script_device_MPDMv4_Dimmer.lua"


If followed the step-by-step setup from above and all OK, you should end up with a working MPDMv4 AC Dimmer interface as before under RaspberryPI :)


Tuesday, December 6, 2016

ESPEasy - P2 - Domoticz - RPi - MPDMv4 AC Dimmer setup example


UPDATE !! If you are using Domoticz under Windows, please take a look also at the PART3


Part 2 of the ESPEasy Series. This time we will go further and complete a full ESP8266 / Domoticz Dimmer setup on a RPi2 Board using the MPDMv4 Universal AC Dimmer Board.


You can find more details about ESP Easy firmware HERE, on the ESP Easy WIKI page


What we will need:

- ESP8266 NextEVO Board
- MPDMv4 Universal AC Dimmer - available also on Tindie Store !
- ESP Easy firmware
- Raspberry PI 2 Board
- Domoticz
   Lates available bin on a Raspberry PI 2 Board install :  
     sudo curl -L install.domoticz.com | bash


Software 

 LUA Script for Domoticz MPDM4 Universal AC Dimmer implementation:

commandArray = {}
DomDevice = 'MPDMv4_Dimmer';
IP = '192.168.1.169';
PIN = "5";
if devicechanged[DomDevice] then
   if(devicechanged[DomDevice]=='Off') then
     print ("OFF dimm = "..uservariables['dimm']);
     CalcValue = 890;
   else if(devicechanged[DomDevice]=='On') then
        DomValue = uservariables['dimm'];
        print ("ON dimm = "..uservariables['dimm']);
        CalcValue = DomValue;
      else
         print("Other");
         DomValue = otherdevices_svalues[DomDevice];
         CalcValue = 900-(DomValue*9);
         commandArray['Variable:dimm'] = tostring(CalcValue);
         print ("dimm Level = "..uservariables['dimm']);
   end
   end
   runcommand = "curl 'http://" .. IP .. "/control?cmd=PWM,"  ..PIN.. "," .. CalcValue .. "'";
   os.execute(runcommand);
print("PWM calculated value= "..CalcValue);
end
return commandArray

 You need to save it in your Domoticz folder under "/scripts/lua/" subfolder as "script_device_MPDMv4_Dimmer.lua"


If followed step-by-step setup as done in the Youtube Video Tutorial above and all OK, you should end up with a working MPDMv4 AC Dimmer interface as below:


 In Part 3 you can find details about changes that need to be done for a Domoticz for Windows installation.


Happy Breadboarding!!

Saturday, December 3, 2016

ESPEasy Series - Part 1 - Firmware upload and MPDMv4 driver simple test


ESP Easy Series, Part 1: Firmware upload and MPDMv4 driver simple test


  The ESP Easy firmware can be used to turn the ESP module into an easy to use multifunction sensor device for Home Automation solutions, been easy to integrate it in setups based on Domoticz, OpenHUB, etc.
  The configuration process of the ESP Easy is entirely web based, so once you've got the firmware loaded, you don't need any other tool besides a common web browser.

You can find more details about ESP Easy firmware HERE, on the ESP Easy WIKI page


What we will need:

- ESP8266 NextEVO Board
- MPDMv4 Universal AC Dimmer  - available also on Tindie Store !
- PCA9685 16CH PWM Extension board
- MPRSx8 Home Automation Board
- ESP Easy firmware
- Raspberry PI 2 Board
- Domoticz
   Lates available bin on a Raspberry PI 2 Board install :  
     sudo curl -L install.domoticz.com | bash


  First thing that I want to mention, as I found that a lot of people sometime forget about this simple one: You DAC/ADC/PWM, etc Input/Output is as good as your Power Supply/Voltage regulator!! If you have a crap power supply/regulator output with bad filtering & stuff, don't expect miracles happening!


You have at least 3 ways to drive a MPDMv4 AC Dimmer:

   1. ESP8266 PWM output:

      It is working OK as long as you don't have any blocking process running on the ESP8266 that can badly interrupt your PWM signal (1/2 second and more). With a bit of attention to some details and also for not to complicated lighting setup scenarios is working very nice.
    I will do also a more complicated setup example Youtube Video showing you the MPDMv4 AC Dimmer working OK driven directly by ESP8266 PWM pin, connected as a daughter board on the MPRSx8 Home Automation board. From Domoticz you can drive thru ESPEasy the MPRSx8 8ON/OFF AC Relays AND MPDMv4 AC Dimmer channel without any problems at all!

MPDMv4 AC Dimmer board has a first order filter on the VCNT input so can handle even noisy PWM and decent level of duty cycle skipping/derating.


  2. Dedicated PWM IC.

     I have used with a lot of success the PCA9685, working very smooth and has no problem related with ESP8266 workload process, etc. You can find more about a PCA9685 Board here. Probably the best solution for multiple AC Dimmer boards (upto 16 per each PCA9685 Extension Board).


 3. Digital driver using a dedicated DAC IC.

     VCNT input voltage driven from a MCP4726 12 bit DAC output is working very smooth and has no problem related with ESP8266 workload process, etc, same as with PCA9685.
As been a 12 Bit DAC it's giving you very fine VCNT control. I have designed also a Dimmer board with integrated DAC and digital control, but that's another story.


In Part 2, we will talk about Domoticz setup and MPDMv4 AC Dimmer control interface.

Wednesday, November 4, 2015

Raspberry PI2 + Thingspeak on JESSIE


   This is a follow-up for the previous Raspberry PI2 - Standalone Thingspeak server installation

   Because many people have encountered lots of issues with the installation, mainly r8188eu WIFI chipset driver issues or strange compile problems, I was thinking to give a chance also to the new RASPBIAN Jessie, maybe it might be possible to make life easier for many of us.

   The setup environment remain the same, same remain the SD Card flashing process, so please take a look first at : Raspberry PI2 - Standalone Thingspeak server installation

   First thing: because I use RPI2 board headless, I have disabled the new default boot to graphical interface that Jessie has, CLI is more than enough for me.


   GOOD NEWS!! The issue with the r8188eu WIFI seems to be solved. At least my dongle worked this time out of the box, nothing fancy to be done anymore.


   Below is the full transcript of a Thingspeak Server installation process finished about 30 min ago, using a fresh new RASPBIAN Jessie image:


System Update & required packages install

  • Switched over to SSH remote access with Putty - accept new key
  • Change "pi" account password:
                  pi@RPIMON1~$passwd
  • Set ROOT password, so you can then use root (just for very, very special things!)
              pi@RPIMON1~$sudo passwd root
  • System Update & upgrade  :
              pi@RPIMON1~$sudo apt-get update            
              pi@RPIMON1~$sudo apt-get upgrade          
              pi@RPIMON1~$sudo apt-get dist-upgrade   
              pi@RPIMON1~$sudo sync

  • Reboot:
            pi@RPIMON1~$ sudo reboot
  • INSTALL Required packages:
           pi@RPIMON1~$sudo apt-get -y install build-essential git mysql-server mysql-client 
                                       libmysqlclient-dev libxml2-dev libxslt-dev libssl-dev libsqlite3-dev  

 MySQL Database configuration

    pi@RPIMON1~$mysql --user=root mysql -p useyourpasswd here
    pi@RPIMON1~$mysql> CREATE USER 'thing'@'localhost' IDENTIFIED BY 'speak’;
    pi@RPIMON1~$mysql> GRANT ALL PRIVILEGES ON *.* TO 'thing'@'localhost' WITH GRANT OPTION;
    pi@RPIMON1~$mysql> commit;
    pi@RPIMON1~$mysql> exit;


Ruby / Rails install

          pi@RPIMON1~$wget http://cache.ruby-lang.org/pub/ruby/2.1/ruby-2.1.5.tar.gz
          pi@RPIMON1~$tar xvzf ruby-2.1.5.tar.gz
          pi@RPIMON1~$cd ruby-2.1.5
          pi@RPIMON1~$./configure
          pi@RPIMON1~$make


MAKE RESULT:

  Files:        962
  Classes:     1414 ( 566 undocumented)
  Modules:      268 (  87 undocumented)
  Constants:   2098 ( 624 undocumented)
  Attributes:  1146 ( 272 undocumented)
  Methods:    10651 (2228 undocumented)

  Total:      15577 (3777 undocumented)
   75.75% documented

  Elapsed: 812.6s
 

(That means you need to be VERY patient thru the entire process ! :) )


          pi@RPIMON1~$sudo make install
          pi@RPIMON1~$cd ..
          pi@RPIMON1~$echo "gem: --no-rdoc --no-ri" >> ${HOME}/.gemrc
          pi@RPIMON1~$sudo gem install rails


THINGSPEAK SERVER INSTALL

    pi@RPIMON1~$git clone https://github.com/iobridge/thingspeak.git
    pi@RPIMON1~$cp thingspeak/config/database.yml.example thingspeak/config/database.yml
    pi@RPIMON1~$cd thingspeak
    pi@RPIMON1~$bundle install
    pi@RPIMON1~$bundle exec rake db:create

   
Check MYSQL DB:

    pi@RPIMON1~$mysql --user=root mysql -p
    pi@RPIMON1~$mysql> show databases;

#+----------------------------  +
#| Database                        |
#+----------------------------  +
#| information_schema        |
#| mysql                              |
#| performance_schema      |
#| thingspeak_development |
#| thingspeak_test               |
#+------------------------------+


     pi@RPIMON1~$mysql> exit; 

IF MYSQL DB OK  then :

     pi@RPIMON1~$bundle exec rake db:schema:load


 RUN the THINGSPEAK SERVER:

    pi@RPIMON1 ~/yourthingspeak $ rails server webrick.


 That's it! Prepare yourself for about 4 hours of patience :)

 Waiting your feedback about!


Wednesday, May 27, 2015

Raspberry PI - Standalone Thingspeak Server installation


UPDATE !! UPDATE !! UPDATE !! UPDATE !!

New fresh install instructions based on the new RASPBIAN Jessie: Raspberry PI2 + Thingspeak Server on RASPBIAN Jessie

-------------------------------------------------------------------------------------------------

Original Article

     As you might read already in my previous  ESP8266 Battery Monitor System  post I was using Thingspeak.com, because of it's flexibility, as a logger for live data uploading.
In the latest week I was exploring deeper Thigspeak capabilities.

   As you know, Thinspeak.com it's a open source project, and you have full access to the project sources on Github 

   What I was interested for was to check the possibility to build/configure and use a standalone Thingspeak Server that can run independently of Internet infrastructure on a small footprint, low power consumption platform.
   The interesting part regarding the Thingspeak Server deployment is the chosen platform, the new RASPBERRY PI 2 Board!


    I will present you below the step-by-step process to install your own RPI Thingspeak Server that can be tailored on your own needs and ofcourse, not affected by Internet connection availability and uptime if installed in the same physical location/LAN as your ESP8266 BMS or any sensor grid/array you might want to use with!


INSTALLATION PROCESS:


1.  Install a Raspberry Pi Operating System image on SD card

  •  Download the Raspbian image from RPI website
  •  Write image to SDCard
    For more details please read RPI Install Guide

I was using the Win32DiskImager utility under W7Pro for that, worked like a charm.


2. First RPI RUN with the new SDCard:


  • Inset card in RPI2
  • Boot 
  • From raspi-config:
              - Set to use entire SDcard space
              - Set hostname: RPIMON1
              - Enable SSH Server
              - Write down your new RPI IP: 192.168.2.xx

  • Reboot for apply new hostname & settings
                pi@RPIMON1~$ sudo reboot


3. System Update & required packages install
  • Switch over to SSH remote access with Putty - accept new key


  • Change "pi" account password:
                  pi@RPIMON1~$passwd
  • Set ROOT password, so you can then use root (just for very, very special things!)
              pi@RPIMON1~$sudo passwd root

  • System Update & upgrade  :
              pi@RPIMON1~$sudo apt-get update            
              pi@RPIMON1~$sudo apt-get upgrade          
              pi@RPIMON1~$sudo apt-get dist-upgrade   
              pi@RPIMON1~$sudo sync

  • Reboot:
            pi@RPIMON1~$ sudo reboot


  • Required packages:
           pi@RPIMON1~$sudo apt-get -y install build-essential git mysql-server mysql-client 
                                       libmysqlclient-dev libxml2-dev libxslt-dev libssl-dev libsqlite3-dev


4.  MySQL Database configuration


pi@RPIMON1~$mysql --user=root mysql -p useyourpasswd here
pi@RPIMON1~$mysql> CREATE USER 'thing'@'localhost' IDENTIFIED BY 'speak’;
pi@RPIMON1~$mysql> GRANT ALL PRIVILEGES ON *.* TO 'thing'@'localhost' WITH GRANT OPTION;
pi@RPIMON1~$mysql> commit;
pi@RPIMON1~$mysql> exit;


5.  Ruby & Rails install

          pi@RPIMON1~$wget http://cache.ruby-lang.org/pub/ruby/2.1/ruby-2.1.5.tar.gz
          pi@RPIMON1~$tar xvzf ruby-2.1.5.tar.gz
          pi@RPIMON1~$cd ruby-2.1.5
          pi@RPIMON1~$./configure
          pi@RPIMON1~$make
          pi@RPIMON1~$sudo make install
          pi@RPIMON1~$cd ..
          pi@RPIMON1~$echo "gem: --no-rdoc --no-ri" >> ${HOME}/.gemrc
          pi@RPIMON1~$sudo gem install rails


 6.  THINGSPEAK SERVER INSTALL

pi@RPIMON1~$git clone https://github.com/iobridge/thingspeak.git
pi@RPIMON1~$cp thingspeak/config/database.yml.example thingspeak/config/database.yml
pi@RPIMON1~$cd thingspeak
pi@RPIMON1~$bundle install
pi@RPIMON1~$bundle exec rake db:create

pi@RPIMON1~$mysql --user=root mysql -p
pi@RPIMON1~$mysql> show databases;
pi@RPIMON1~$mysql> exit;


IF all OK continue with loading Thingspeak DB configuration

pi@RPIMON1~$bundle exec rake db:schema:load


RUN the THINGSPEAK SERVER:

pi@RPIMON1 ~/yourthingspeak $ rails server webrick


And the result in Browser:

Running Thingspeak on RPI Board

Create new Thingspeak USER:

Thingspeak Signup page


Create new CHANNEL

Create new channel for ESP8266 BMS data upload


Live Data update:

ESP8266 BMS  - Live data upload


UPDATE !! UPDATE !! UPDATE !! UPDATE !!

New fresh install instructions based on the new RASPBIAN Jessie: Raspberry PI2 + Thingspeak Server on RASPBIAN Jessie