Showing posts with label Battery monitor. Show all posts

Friday, March 24, 2017

Thingspeak - SmartMon Ext Board P4

This is Part 4 of the SmartMon Extension Board series.

SmartMon v2.7ex Board  is a extension board fully compatible with Arduino, ESP8266, ARM, PIC & other available MCu's out there.  As long as your MCU/Dev Board has I2C Bus capabilities you are good to go!
It is probably one of the easiest ways to create your own Voltage/Current and Power consumption monitoring system for your Projects, devices, batteries, power supplies and many more!


UPDATE !! SmartMon v2.7Ex is available also on Tindie Store !


This time we will go thru a full example on how to monitor your power line and load, read Voltage/Current and Power consumtion data and upload them on the Thingspeak related Channel.

Previous Articles:


What we will need:


Software implementation:

Thingspeak channels or standalone Thingspeak Server setup part is not covered in this article.
 If interested to see how can be done a standalone Thingspeak Server, please take a look here:
1. RaspberryPI - Standalone Thingspeak Server install
2. RaspberryPI2 - Thingspeak Server install on Jessie 


To make it running, you need also the function from the previous article:

Part 3: INA219 Driver and a simple data read example 


Send data to Thingspeak function
function sendDataTh()
    print("Sending data to thingspeak.com")
    conn=net.createConnection(net.TCP, 0)
        conn:on("receive", function(conn, payload) print(payload) end)
        -- api.thingspeak.com 184.106.153.149
        conn:connect(80,'184.106.153.149')
        conn:send('GET /update?key=T89U8XLJDPQTW0AR&field1='..volt..'&field2='..current..'&field3='..power..'&field4='..peng..'HTTP/1.1\r\n')
        conn:send('Host: api.thingspeak.com\r\n')
        conn:send('Accept: */*\r\n')
        conn:send('User-Agent: Mozilla/4.0 (compatible; esp8266 Lua; Windows NT 5.1)\r\n')
        conn:send('\r\n')
        conn:on("sent",function(conn) print("Closing connection")
        conn:close()
    end)
    conn:on("disconnection", function(conn) print("Got disconnection...")
    end)
end 


Main Program
---- INA216 Module TEST
init_i2c()
setCAL_reg()
print_values()
If you want to read and update values every minute add function from below:
tmr.alarm( 1, 60000, 1, function()
     print_values()
     sendDataTh()
end)
You can stop your running timer anytime with:
tmr.stop(1)

Thursday, March 16, 2017

Smart Mon Ext Board - Software example - P3

This is Part 3 of the SmartMon Extension Board series.

  SmartMon v2.7ex Board  is a extension board fully compatible with Arduino, ESP8266, ARM, PIC & other available MCu's out there.  As long as your MCU/Dev Board has I2C Bus capabilities you are good to go!
It is probably one of the easiest ways to create your own Voltage/Current and Power consumption monitoring system for your Projects, devices, batteries, power supplies and many more!


UPDATE !! SmartMon v2.7Ex is available also on Tindie Store !


Previous Articles:


What we will need:


Software implementation: 

1.  INIT Data
id = 0
sda = 2
scl = 1
devaddr = 0x40   -- A0,A1 = GND

voltage = 0
current = 0
power = 0
peng = 0
eng = 0

2. I2C  Init function 
function init_i2c()
  i2c.setup(id, sda, scl, i2c.SLOW)
end

3. INA219 Reset function
function reset()
  write_reg(0x00, 0xFFFF)
end

4. Read register function
 --read from reg_addr content of dev_addr
function read_reg_str(reg_addr)
  i2c.start(id)
  i2c.address(id, devaddr, i2c.TRANSMITTER)
  i2c.write(id,reg_addr)
  i2c.stop(id)
  tmr.delay(1)
  i2c.start(id)
  i2c.address(id, devaddr, i2c.RECEIVER)
  c=i2c.read(id, 16) -- read 16bit val
  i2c.stop(id)
  return c
end

5. Read register function - 16bit--returns 16 bit int
function read_reg_int(reg_addr)
  i2c.start(id)
  i2c.address(id, devaddr, i2c.TRANSMITTER)
  i2c.write(id,reg_addr)
  i2c.stop(id)
  tmr.delay(1)
  i2c.start(id)
  i2c.address(id, devaddr, i2c.RECEIVER)
  local c = i2c.read(id, 16) -- read 16bit val
  i2c.stop(id)
  --convert to 16 bit int
  local val = bit.lshift(string.byte(c, 1), 8)
  local val2 = bit.bor(val, string.byte(c, 2))
  return val2
end

6. Write register function
function write_reg(reg_addr, reg_val)
  print("writing reg:" .. reg_addr .. ", reg_val:" .. reg_val)
  i2c.start(id)
  i2c.address(id, devaddr, i2c.TRANSMITTER)
  local bw = i2c.write(id, reg_addr)
  local bw2 = i2c.write(id, bit.rshift(reg_val, 8))
  local bw3 = i2c.write(id, bit.band(reg_val, 0xFF))
  i2c.stop(id)
end

7. Calibration / settings function
function setCAL_reg()
  maxVoltage = 32
  maxCurrentmA = 10000
  write_reg(0x05,3950) --CALIBRATE FOR YOUR rshunt & stuff
  local config = 15391
  write_reg(0x00, config)
end

8. Read Current values (mA)
 function getCurrent_mA()
  local valueInt = read_reg_int(0x04)
  return valueInt
end

9. Read Bus Voltage (V)
 function getBusVoltage_V()
  local valueInt = read_reg_int(0x02)
  -- Shift to the right 3 to drop CNVR and OVF and multiply by LSB = 4
  local val2 = bit.rshift(valueInt, 3)
  local val2 = val2 * 4
  return val2 * 0.001
end

10. Read Shunt resistor voltage drop (mV)
function getShuntVoltage_mV()
  -- Gets the raw shunt voltage (16-bit signed integer, so +-32767)
  local valueInt = read_reg_int(0x01)
  return valueInt * 0.01
end

11. Read Bus Power (W) 
function getBusPowerWatts()
  local valueInt = read_reg_int(0x03)
  return valueInt*20*0.001
end

12. Print read values 
 function print_values()
  volt = getBusVoltage_V()
  print("\nVoltage  :  " .. volt.." V")
  current = getCurrent_mA()/1000
  power = getBusPowerWatts()
  if (current > 65 ) then
         print("ERR 00.23")
         current = 0
         power = 0
  end
  eng = eng + power/60
  print("Current  : " .. string.format("%6.3f",current) .." A")
  print("Power    :  " .. power .." W\n")
  print("Energy   : " .. string.format("%6.3f",eng) .." Wh\n")
end

MAIN Program
---- INA216 Module TEST
init_i2c()
setCAL_reg()
print_values()

If you want to read and update values every minute add function from below:

tmr.alarm( 1, 60000, 1, function()
     print_values()
     sendDataTh()
end)
You can stop your running timer anytime with:
tmr.stop(1)


That's all for today, next time we will more further and we will go thru a full SmartMon Battery Monitor System + Thinkspeak data upload example.


Creative Commons License All schematics, boards, software and articles released by ESP8266-Projects.com are licensed under a Creative Commons Attribution-NonCommercial 4.0 International License. 


Thursday, August 11, 2016

ESP8266 - Internal ADC 2 - the easy way example


This is just a very quick example on how to add a Voltage Divider to the ESP8266 Internal ADC input to increase the ADC input range.

For more theory behind, please take a look at the previous related article: ESP8266 - Internal ADC


Today project:

      Measure a voltage input range from 0-5V with the ESP8266 internal ADC


What do we need:

  • 2 Resistors for the voltage divider, R1=105.6k, R2=24.08k. I am using here precision resistors and the values are measured values with a proper calibrated bench meter.
  • a good, trustable, calibrated ok Multimeter.
  • some wires to connect all together.


I will not insist on connections, take a deeper look at the previous article about


Voltage divider schematic and Vout (ADC input voltage) formula


How do we do it :


1. Measure your Max desired input voltage
    In my case, Max Input Voltage (Vmax) = 5.1919 (measured)


2. Measure Resistors values:
    R1 = 105.6k
    R2 = 24.08k


3. Check if Full Scale Value at the voltage divider output is inside the ADC defined domain:
  • Calculated : Vout = (R2/(R1+R2))*Vin = 0.964072733 V
  • Measured = 0.96038V
     Good enough for the precision we are looking for. ESP8266 ADC is 10bit only and not exactly the most accurate in town


4. Calculate Voltage Divider Ratio:
  • Vdivider Ratio= Max Input Voltage/Fullscale value =  5.405976676


5.  Read ADC value : 
       adcr = adc.read(0)
      print("    ReadADC     : "..adcr)
     Average result for adcr = 1017

THIS IS IMPORTANT !! It tell us that we are inside the ADC domain as adcr < 1024 !

IF adcr > 1023 then you need to adjust your voltage divider resistors to fit inside ADC domain!


6. Calculate LSB  in 2 ways to cross check that we have the right value:
  • LSB = Input Voltage read by multimeter/ADC readed Value = 
                   =  5.1919 / 1017 =  0.005105113 V
      OR
  • LSB = (ADC Input  pin read Voltage by multimeter/ADC readed Value/)*Vdivider Ratio = 
                  = (0.96038/1017)*5.405976676 = 0.005105113 V
       It looks that we have the right LSB Value for our exercise!

     If you want to know also the ADC LSB, then
       LSB = ADC Input  pin read Voltage by multimeter/ADC readed Value  =   
                =  0.96038/1017 = 0.000944346 V

    Guess what's happening if you multiply ADC LSB with Vdivider ratio :)


7. Software Implementation for the ADC read function:

 function readADC()
      ad = 0
      LSB = 0.005105113 --calibrate based on your voltage divider AND Vref!
      adcr = adc.read(0)
      ad= adcr*LSB       
      print("    ReadADC     : "..adcr)
      print("    Read Voltage     : "..ad)
      return ad
end

and some results in the terminal window:

> SENT: readADC()
readADC()
    ReadADC     : 1017
    Read Voltage     : 5.191899921
>


Tuesday, June 2, 2015

Mailbag Arrival !! ACS712 Current Sensor Board


   Because of the very cheap ACS712 Current Sensor Board modules available all over the place, I really think that everybody heard about ACS712 sensor from Allegro MicroSystems.

  As I was asked if "Can be used as a current sensor module for our ESP8266 Projects without too much hustle?", I ordered few of them and let's explore them for the answer :)

   The ACS712 device consists of a precise, low-offset, linear Hall circuit with a copper conduction path located near the surface of the die. That means that it is a isolated path device, a very nice thing if you want to monitor MAINS Current or any other High Voltage path that you want isolated from your device.

IMPORTANT NOTE !!  This device is a Hall Effect transducer.  It should not be used near significant magnetic fields.  If you have a magnetic noisy environment take a look at other solutions like isolation transformers, isolation OpAmps, linear isolation circuit, bus path isolation, etc.


 Theory of operation 

 Applied current flowing through the ACS712 copper conduction path generates a magnetic field which the Hall IC converts into a proportional voltage. Device accuracy is optimized through the close proximity of the magnetic signal to the Hall transducer.
A precise, proportional voltage is provided by the low-offset, chopper-stabilized BiCMOS Hall IC, which is programmed for accuracy after packaging.

  The ACS712 outputs an analog signal, VIOUT that varies linearly with the uni- or bi-directional AC or DC primary sampled current, IP (between IP+ e IP-) within the range specified.

  It requires a power supply of 5V (VCC) and two capacitors to filter power supply and output.
CF is recommended for noise management, with values that depend on the application.

Typical application from the Datasheet: 


   ACS712 Current Board comes in 3 different models of this integrated circuit, depending on the maximum measured current : 5A  20  or  30A

5A Module20A Module30A Module
Supply Voltage (VCC)     5VDC     5VDC        5VDC
Measurement Range   -5 to +5 A   -20 to +20 A        -30 to +30 A
Voltage at 0A   VCC/2     VCC/2      VCC/2
Scale Factor   185 mV/A   100 mV/A      66 mV/A
Variant  ACS712ELC-05A   ACS712ELC-10A     ACS712ELC-30A


   For our today experiment, I will use the one below, a 100mV/A one:


What we will need:
  •  ACS712 Current Board module (pick your desired choice -  5A, 20A, 30A )
  • CBDB Board ( or any other ESP8266 Board you may like but who has the same capabilities)
  •  USB adapter (take a look on Part 1 for details about the USB Adapter 
  •  2 x 10 Ω /10 W  - Load resistors
  • Connection wires - various colors
  • Breadboard
  • Bench Power Supply 
  • Voltage Level Shifter and dc amplifier module - VLSAM DC(see details below)


Voltage Level Shifter and amplifier module - VLSAM DC

  As our main goal is to explore the posibility to use the ACS712 module with ESP8266 devices, from the description above and datasheet we can identify very quick some problems that need to be solved to make ACS712 a "ESP Friendly" device:

ASC712: 
  •  5 Vdc power supply device
  •  measure positive and negative 5/20/30Amps, corresponding to the analog output 100mV/A BUT
  • "ZERO" point, means no test current through the output voltage is VCC / 2 =5v/2=2.5V !

ESP8266:
  • 3V only device
  • ADC range  max: 0-1V

  What we will need is to "move" the "ZERO" point as low as we want to GND and in the same time to amplify the received analog signal to obtain a better resolution in the desired measuring range. (don't forget, for our experiment we have DC only voltage here and just one current flow direction)

   So, what can be done? 

Probably they are some other solutions to this problem, and if you know any of them, please feel free to share in the comments below, but the clasical one is to use a difference amplifier:


    This kind of amplifier uses both inverting and non-inverting inputs of a OPAmp with a gain of one to produce an output equal to the difference between the inputs. Actually if you take a closer look it is a special case of the differential amplifier.
   The good thing is that in the same time you can also choose the resistances values in a way to amplify the difference. 

    If all the resistor values are equal, this amplifier will have a differential voltage gain of 1. The analysis of this circuit is essentially the same as that of an inverting amplifier, except that the noninverting input (+) of the op-amp is at a voltage equal to a fraction of V2, rather than being connected directly to ground. As would stand to reason, V2 functions as the noninverting input and V1 functions as the inverting input of the final amplifier circuit. Therefore:

                  Vout = V2 - V1

    If we want to provide a differential gain of anything other than 1, we would have to adjust the resistances in both upper and lower voltage dividers, necessitating multiple resistor changes and balancing between the two dividers for symmetrical operation.

    A limitation of this simple amplifier design is the fact that its input impedances are rather low compared to that of some other op-amp configurations, most notably the noninverting (single-ended input) amplifier. Each input voltage source has to drive current through a resistance, which constitutes far less impedance than the bare input of an op-amp alone. It is a solution to this problem, fortunately, quite simple,  all we need to do is “buffer” each input voltage signal through a voltage follower.


   For our case, as we want to "substract" the ACS712 - 2.5Vdc to move the "ZERO" point near GND, we will have:
  • V1 = 2.5V - can be easy obtained from 5V with a buffered voltage divider
  • V2 = VIOUT - output voltage from ASC712 Module
  • Amplification:
    • IF R1=R2=R3=R4=10K 
      •  output for ADC input of 100mV/A
      • max range: 10A
      • resolution:  10mA
    • Changing range  R1=R2=10K, R3=R4=100k 
      • output for ADC input of 1V/A
      • max range: 1A
      • resolution: 1mA


VLSAM DC Schematic


And the simulation result for a 0-10A, 2.5-3.5 VIOut sweep:


  • GREEN      - Voltage divider output  : 2.5Vdc
  • FUCHSIA  -  ASC712 VIOut            : 2.5 -> 3.5Vdc
  • RED           -  ADC input                   : 0 -> 1Vdc


So far so good, let's move it on a breadboard for a quick test:


Wednesday, May 27, 2015

Raspberry PI - Standalone Thingspeak Server installation


UPDATE !! UPDATE !! UPDATE !! UPDATE !!

New fresh install instructions based on the new RASPBIAN Jessie: Raspberry PI2 + Thingspeak Server on RASPBIAN Jessie

-------------------------------------------------------------------------------------------------

Original Article

     As you might read already in my previous  ESP8266 Battery Monitor System  post I was using Thingspeak.com, because of it's flexibility, as a logger for live data uploading.
In the latest week I was exploring deeper Thigspeak capabilities.

   As you know, Thinspeak.com it's a open source project, and you have full access to the project sources on Github 

   What I was interested for was to check the possibility to build/configure and use a standalone Thingspeak Server that can run independently of Internet infrastructure on a small footprint, low power consumption platform.
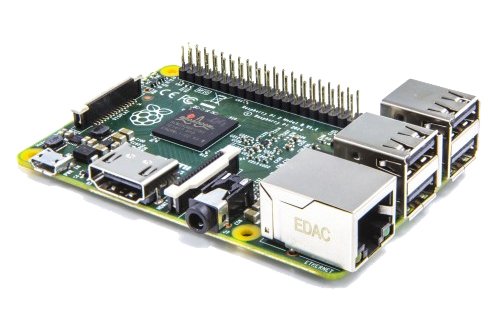
   The interesting part regarding the Thingspeak Server deployment is the chosen platform, the new RASPBERRY PI 2 Board!


    I will present you below the step-by-step process to install your own RPI Thingspeak Server that can be tailored on your own needs and ofcourse, not affected by Internet connection availability and uptime if installed in the same physical location/LAN as your ESP8266 BMS or any sensor grid/array you might want to use with!


INSTALLATION PROCESS:


1.  Install a Raspberry Pi Operating System image on SD card

  •  Download the Raspbian image from RPI website
  •  Write image to SDCard
    For more details please read RPI Install Guide

I was using the Win32DiskImager utility under W7Pro for that, worked like a charm.


2. First RPI RUN with the new SDCard:


  • Inset card in RPI2
  • Boot 
  • From raspi-config:
              - Set to use entire SDcard space
              - Set hostname: RPIMON1
              - Enable SSH Server
              - Write down your new RPI IP: 192.168.2.xx

  • Reboot for apply new hostname & settings
                pi@RPIMON1~$ sudo reboot


3. System Update & required packages install
  • Switch over to SSH remote access with Putty - accept new key


  • Change "pi" account password:
                  pi@RPIMON1~$passwd
  • Set ROOT password, so you can then use root (just for very, very special things!)
              pi@RPIMON1~$sudo passwd root

  • System Update & upgrade  :
              pi@RPIMON1~$sudo apt-get update            
              pi@RPIMON1~$sudo apt-get upgrade          
              pi@RPIMON1~$sudo apt-get dist-upgrade   
              pi@RPIMON1~$sudo sync

  • Reboot:
            pi@RPIMON1~$ sudo reboot


  • Required packages:
           pi@RPIMON1~$sudo apt-get -y install build-essential git mysql-server mysql-client 
                                       libmysqlclient-dev libxml2-dev libxslt-dev libssl-dev libsqlite3-dev


4.  MySQL Database configuration


pi@RPIMON1~$mysql --user=root mysql -p useyourpasswd here
pi@RPIMON1~$mysql> CREATE USER 'thing'@'localhost' IDENTIFIED BY 'speak’;
pi@RPIMON1~$mysql> GRANT ALL PRIVILEGES ON *.* TO 'thing'@'localhost' WITH GRANT OPTION;
pi@RPIMON1~$mysql> commit;
pi@RPIMON1~$mysql> exit;


5.  Ruby & Rails install

          pi@RPIMON1~$wget http://cache.ruby-lang.org/pub/ruby/2.1/ruby-2.1.5.tar.gz
          pi@RPIMON1~$tar xvzf ruby-2.1.5.tar.gz
          pi@RPIMON1~$cd ruby-2.1.5
          pi@RPIMON1~$./configure
          pi@RPIMON1~$make
          pi@RPIMON1~$sudo make install
          pi@RPIMON1~$cd ..
          pi@RPIMON1~$echo "gem: --no-rdoc --no-ri" >> ${HOME}/.gemrc
          pi@RPIMON1~$sudo gem install rails


 6.  THINGSPEAK SERVER INSTALL

pi@RPIMON1~$git clone https://github.com/iobridge/thingspeak.git
pi@RPIMON1~$cp thingspeak/config/database.yml.example thingspeak/config/database.yml
pi@RPIMON1~$cd thingspeak
pi@RPIMON1~$bundle install
pi@RPIMON1~$bundle exec rake db:create

pi@RPIMON1~$mysql --user=root mysql -p
pi@RPIMON1~$mysql> show databases;
pi@RPIMON1~$mysql> exit;


IF all OK continue with loading Thingspeak DB configuration

pi@RPIMON1~$bundle exec rake db:schema:load


RUN the THINGSPEAK SERVER:

pi@RPIMON1 ~/yourthingspeak $ rails server webrick


And the result in Browser:

Running Thingspeak on RPI Board

Create new Thingspeak USER:

Thingspeak Signup page


Create new CHANNEL

Create new channel for ESP8266 BMS data upload


Live Data update:

ESP8266 BMS  - Live data upload


UPDATE !! UPDATE !! UPDATE !! UPDATE !!

New fresh install instructions based on the new RASPBIAN Jessie: Raspberry PI2 + Thingspeak Server on RASPBIAN Jessie


Monday, May 18, 2015

P2 - Battery Monitor System - Web Server and data upload


 ================== W A R N I N G ! ! =================
Li-Ion batteries are very dangerous if not handled properly.
Use them only with proper protection circuits and chargers.
DO NOT OVER CHARGE / BURN / OPEN Li-Ion Bats
     Using any of the informations available on esp8266-projects.com
 is on your own risk !!
===============================================
 
    For any new CBDBv2 Evo orders/requests please feel free to use as usual:
     tech at esp8266-projects.com.
     If you want for your own experiments to order CBD v2 EVO bare PCBs only, you can also do it directly at Dirty PCBs, our preferred PCB House:
  http://dirtypcbs.com/view.php?share=5876&accesskey=3d0fd70d53d6dc20c0bf0255f67cde65
------------------------------------------------------------------------------------------------------------------


As promised, today we will continue with our Live Battery Monitor System.


Subjects of the day:
  •  WebServer interface for direct access
  •  Live Data upload over the Internet for wordwide access on Thingspeak.com.


What we will need:  

For schematics, theory of operation and technical related things please see previous article: Battery LIve Monitor System


BLMS Software
 
  For programming CBDBv2 Board and uploading the drivers and the software we will continue to use the LuaUploader as before.


1. Define used GPIO pins and variables:

ADC_SRC = 5                    -- GPIO14 - select Voltage Divider / Current Inputsda=2                                   -- GPIO4  - SDA
scl=1                                    -- GPIO5  - SCL
gpio.mode(ADC_SRC,gpio.OUTPUT, gpio.PULLUP)
gpio.write(ADC_SRC,1)      -- Voltage Measurement - Voltage Divider Source selected
gpio.write(ADC_SRC,0)      -- Current Measurement - Current Shunt Monitor output selected
voltdiv= 0.00412                -- Voltage reading calibration
dival = 0.00096                  -- ADC volt/div value - CALIBRATE !! 
resdiv = 4.31447                -- Voltage Divider Ratio - CALIBRATE!!
divalI = 0.9425                  -- Current volt/div ratio - CALIBRATE!!
cpct = 0                              -- Calculated Delivered Energy
adcI = 0                             -- ADC readings -  Curent

adcV = 0                            -- ADC readings - Voltage
pwr = 0                              -- Calculate Power
t=0                                     -- time  


2. READ ADC Process function  and calculations 

function readUI()

   gpio.write(ADC_SRC,1)
      advr=adc.read(0)
      adcV=advr*dival*resdiv
      print("\nVoltage     : " ..string.format("%g",adcV).." V")


   tmr.delay(10000)
   gpio.write(ADC_SRC,0)
      adcr=adc.read(0)
      adcI=adcr*divalI
      print("Current     : " ..string.format("%g",adcI).." mA")
   --instantaneous Power consumption calculation
   pwr = adcI*adcV
   print("Power       : " ..string.format("%g",pwr).." mW")

   -- total delivered Energy calculation
    if (adcV > 1) then
      cpct=cpct+pwr*0.002778/1000
      t = t +1
       print("Energy      : " ..string.format("%g",cpct).." W")
  else  tmr.stop(0)
        dtime = t/360         -- calculate discharge time

        print("Discharge Time: %.2fh  ",dtime)
  end
end


3. BMS WebServer

srv=net.createServer(net.TCP)
  srv:listen(80,
     function(conn)
        conn:on("receive",function(conn,payload)
        --print(payload)
        conn:send("HTTP/1.1 200 OK\n\n")
        conn:send("<META HTTP-EQUIV=\"REFRESH\" CONTENT=\"5\">")
        conn:send("<html><title>Battery Live Monitor System - ESP8266</title><body>")
        conn:send("<h1>Battery Live Monitor System - ESP8266</h1><BR>")
        conn:send("Voltage :<B><font color=red size=4>" 

                          ..string.format("%g",adcV).." V</font></b><br>")
        conn:send("Current :<B><font color=blue size=4>"

                         ..string.format("%g",adcI).." mA</font></b><br>")
        conn:send("Power   :<B><font color=red size=4>"

                        ..string.format("%g",pwr).." mW</font></b><br>")
        conn:send("Energy  :<B><font color=green size=4>"

                       ..string.format("%g",cpct).." Wh</font></b><br>")
        conn:send("<BR><BR><BR>Node.HEAP     : <b>" .. node.heap() .. "</b><BR>")
        conn:send("IP ADDR    :<b>".. wifi.sta.getip() .. "</b><BR>")
        conn:send("TMR.NOW    :<b>" .. tmr.now() .. "</b><BR<BR><BR>")
        conn:send("</html></body>")
        conn:on("sent",function(conn) conn:close() end)
        conn = nil    
      end)
end)


4. Thingspeak.com data upload  

 function sendDataTh()
    print("Sending data to thingspeak.com")
    conn=net.createConnection(net.TCP, 0)
        conn:on("receive", function(conn, payload) print(payload) end)
        conn:connect(80,'184.106.153.149')
        conn:send("GET /update?key=YOURKEYHERE&field1="..adcV.."&field2="..adcI.."&

                           field3="..pwr.."&field4="..cpct.."HTTP/1.1\r\n")
        conn:send("Host: api.thingspeak.com\r\n")
        conn:send("Accept: */*\r\n")
        conn:send("User-Agent: Mozilla/4.0 (compatible; esp8266 Lua; Windows NT 5.1)\r\n")
        conn:send("\r\n")
        conn:on("sent",function(conn) print("Closing connection")
        conn:close()
    end)
    conn:on("disconnection", function(conn) print("Got disconnection...")
    end)
end


5. MAIN program


If you have a new ESP module or is the first time when using it on a new WIFI network, don't forget to do the WIFI setup:

        -- One time ESP Setup --
        wifi.setmode(wifi.STATION)
         wifi.sta.config ( "YOUR_WIFI_SSID" , "PASSWORD" ) 
         print(wifi.sta.getip())


-- Read ADC data every 10s, print values on local Web interface and send them to thingspeak.com
 tmr.alarm(0, 10000, 1, function() readUI() sendDataTh() end)


   For testing, just save the code on ESP as 'blmsweb.lua', restart ESP and run:   
  
            dofile("blmsweb.lua")      -- Start the Battery Live Monitoring System

            print(wifi.sta.getip())       --print your BMS WebServer IP address


BLMS - First RUN

  If you want the BLMS software to start automatically when your CBDBv2 Evo Board starts or reboots, then you neet to create and add some lines in your 'init.lua' file:
  
            dofile("blmsweb.lua")      -- Start the Battery Live Monitoring System

Save the code on ESP as 'init.lua', restart ESP. It should reboot and restart automatically the program.


Open your favorite Web browser and type your new BLMS Web Server IP address. If all ok, it should look like below :

 
BLMS - Web Server interface - 20ohm Load


Thingspeak data upload

I will not insist on the Thingspeak.com account setup, it's a pretty simple process:
  1. Sign Up for a ThingSpeak account
  2. Create a new Channel by going to your Channels page and clicking Create New Channel
  3. Update your Channel via URL:
    https://api.thingspeak.com/update?api_key=YOUR_CHANNEL_API_KEY&field1=7
  4. View your Channel feed:
    https://api.thingspeak.com/channels/YOUR_CHANNEL_ID/feeds.json
Take a look at this Tutorial for more details for common devices and applications


Thingspeak.com live data uploaded - 10ohm/10W Load for stress test calibration


You can also see on graph below the moment when battery protection kicks in, around 2.4V, 2.37745 V in this case, to be more exactly:


In the video below live monitoring data, with 10 and 20ohm resistor Load: